What are diamond inclusions?
By now I’m guessing that you are pretty much a professional when it comes to the 4 Cs of diamond quality, even if you didn’t learn it all from me. By now, you may be confident in the difference between a D color and a J color, and VVS1 clarity versus SI1 clarity.
What makes one diamond a VVS1 clarity while another is an SI1? “It’s the amount of inclusions in the diamond Rian," you may shriek. And you're right, but what exactly are inclusions in a diamond? What do diamond inclusions look like? And how can you tell what type of inclusion a diamond has? Allow us to begin.
What are Diamond Inclusions?
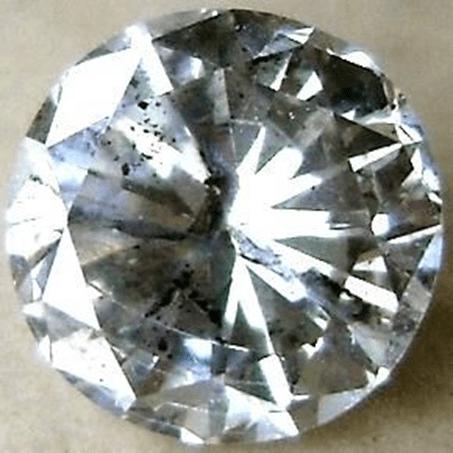
Diamond inclusions are the little imperfections found inside a diamond. Simple! They are tiny marks or blemishes that (mostly) occur during the natural formation of the diamond in the ground where it’s been chillin’ for pretty much thousands of years before you or I came along and decided to dig it up and shove it on our finger. And just like the imperfections found in people, inclusions occur in the vast majority of diamonds. Except maybe Beyoncé.

Not-So-Flawless Diamond
For the most part, the more visible the inclusions are within a diamond, the lower the clarity grade will be (need a refresher on those clarity grades? Check the Clarity guide. However - and this is important – not all inclusions are created equal. Some are worse than others, especially when they have the ability to crack the stone completely! See a short list of the worst inclusion offenders.
It also matters where on the stone they are found – are they smack bang in the center of the stone? Bad news! Are they hidden away to one side where they can be cleverly covered with a prong? Potentially good news!
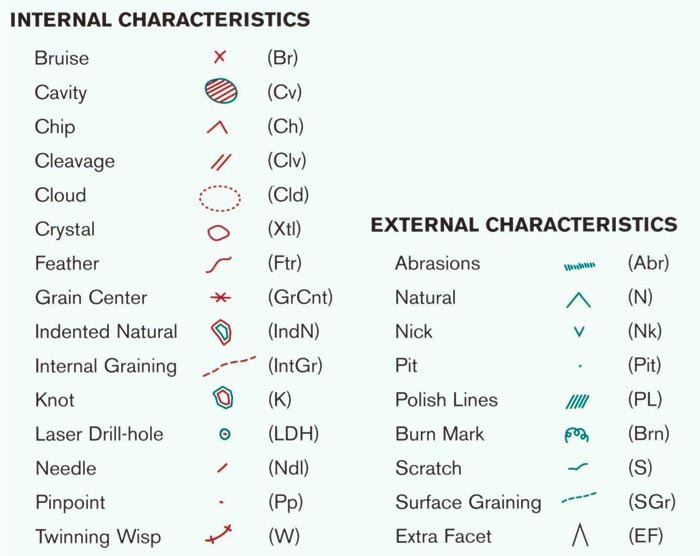
So, what are the different types of diamond inclusion that you might encounter? Surprise! There’s a long list of them. At the bottom of this page there will be links to information on the most common ones. That way you can learn about all of them in detail. For now though, I just want you to take a look at the names of the most common ones, and the symbols that represent them.
The Most Common Types of Inclusions

The inclusions in RED symbolize those imperfections that are found inside the diamond, while the GREEN and BLACK symbols represent marks and blemishes on the outside of the stone. Red and green together mean, yes you’ve guessed it (it wasn’t rocket science to be fair) the inclusion affects both the inside and the outside of the diamond.
These symbols are very handy indeed because they can help you get clued-in as to where the marks and blemishes are located on the actual diamond itself, before you’ve even had a chance to view the stone up close. The information needed to assess the inclusions is all right there on the diamond grading certificate!
Want to know more about these diamond grading certificates? Of course you do. Head over to this page.
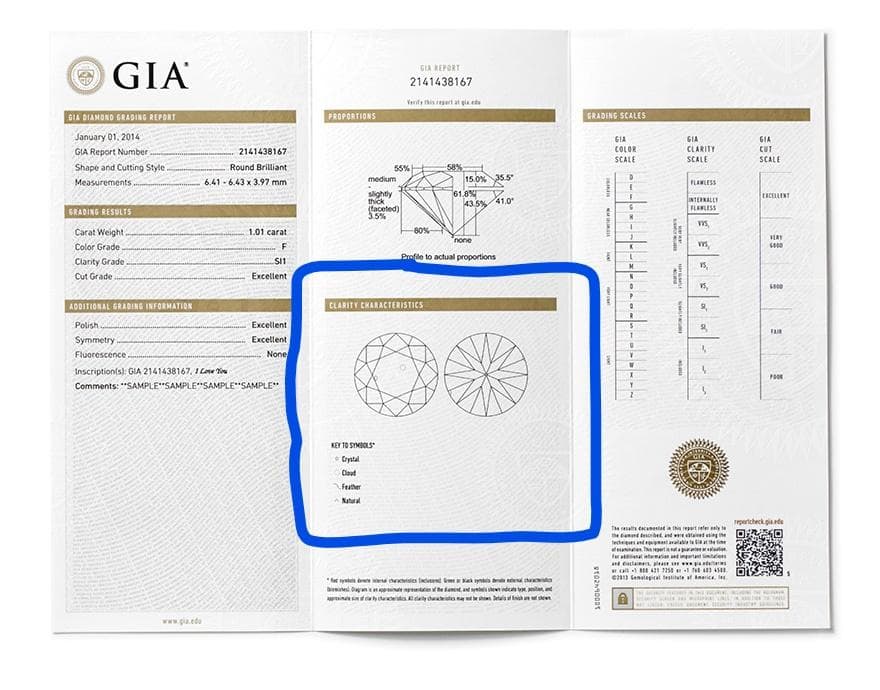
Reading a Diamond Report

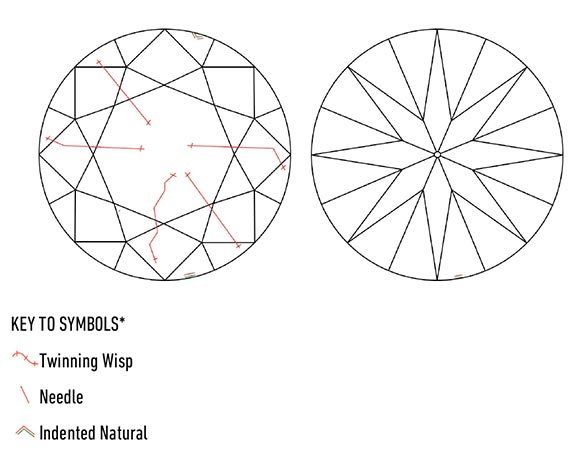
Sitting pretty inside that little blue box which I helpfully drew for you is what’s known as a diamond plot. A diamond plot is basically like a little map of a diamond. It shows you where the most prominent inclusions are on your diamond, and what sort of inclusion it is, using the symbols we looked at above. Let’s take a closer look at another example:

Every plot will show you the same diamond from two different viewpoints. The plot on the left is the ‘top-down’ view, and its purpose is to show you where to find the inclusions if you were looking at the diamond from above. The right-hand plot is the view from underneath the diamond (i.e. if you popped it out of its ring setting and placed it face down).
Below the plot on the left is the ‘Key to Symbols’, which tells us exactly what type of inclusions can be found in this stone. We already know that RED indicates imperfections inside the stone, while RED and GREEN together means the inclusion is both inside and on the surface of the diamond. The symbols will be ordered based on their prominence (and therefore how much they impact on the clarity grade given).
In the above example we can tell that ‘twinning wisps’ are the most prominent inclusion found in this particular diamond, followed by ‘needles’ and ‘indented naturals’. It’s safe to say that - in general - the smaller the number of red/green/black marks on that plot, the higher the clarity grade on the stone, although there are exceptions which we will look at in more detail later on in the series.
"Additional" Diamond Features
One thing to take note of; see if there are any additional ‘_comments_’ on the grading report (found on the bottom left-hand corner of the certificate). For instance, let’s say you take a look at the plot and you see what looks like some fairly benign ‘clouds’ (the little red dotted symbol). “No big deal!” you think naively to yourself. Before you buy, have a quick look in the ‘Comments’ section…
Does it say ‘Additional clouds not shown’? That’s fine! What this usually means is that there were so many miniscule clouds that the diamond graders were too lazy to count and draw in, especially because they wouldn’t have impacted the clarity grade on the stone anyway. So instead of painstakingly putting them all in, they just put a few in the general area to indicate their presence. No biggy! Does it say something like ‘Clarity grade is based on clouds that are not shown’? This could be a problem, especially if you are sitting in the SI clarity band. It might be the case that there is a fairly large (or center-stage) cloud which is impacting the way the light bounces around in the diamond – basically causing it to have about as much life as my Uncle John after he’s had an especially heavy lunch. What you need to do in this – and every - case, is to look at 10x magnified photos and videos of the stone so you can eyeball those ‘clouds’ by themselves.
Read more about specific imperfections:


Diamond Inclusions FAQs